SonOff RF bridge with HomeAssistant
From Eric
Contents |
Tasmota installation
To install the Tasmota firmware on the SonOff Rf bridge, please refer to ...
Once the Tasmota firmware is installed, you can also update the RF firmware. Please look here.
Access the Tasmota device
To access the Rfbridge, simply open a web page to the appropriate ip address.
Executing commands in the console
Connect to the WebUi of the Tasmotized Rf bridge.
Open the console panel:
The list of Tasmota commands can be found at https://tasmota.github.io/docs/Commands/
For instance, to generate a beep:
cmnd/rfbridge/RfRaw 192
MQTT configuration
In the MQTT configuration panel of Tasmota, use your Home Assistant's user and password
Identifying remote control code
- 1st solution Send command "rfkey 2" The bridge beeps briefly Click on the remote controler The bridge beeps again: the code has been learnt Send command "Rfkey 1" to emulate pressing the remote controller button
- 2nd solution Send command "rfraw 177" Press several times on the remote controller Use the frame that seems the most common For instance : {"RfRaw":{"Data":"AA B1 21 03 08 0186 03DE 299A 28190819090908181819090908190818190908190908181818 55"}} Use the online bitbucket converter (here https://bbconv.hrbl.pl/) to translate the B1 code to a B0 code : Send the command using backlog to emulate the controller: Topic is : "cmnd/rfbridge/Backlog" Payload is : "Rfraw AA B0 21 03 08 0186 03DE 299A 28190819090908181819090908190818190908190908181818 55; RfRaw "
- With my other remote controllers (Qiachip with EV1527 code), TASMOTA returns messages such as:
09:04:59.092 MQT: tele/rfbridge/RESULT = {"Time":"2021-09-04T09:04:59","RfReceived":{"Sync":12020,"Low":430,"High":1270,"Data":"038104","RfKey":"None"}}
Sending remote control codes
From HomeAssistant
For the first category of remote controlled switches, I use the following configuration, but without success
 - platform: mqtt
   name: "RFPlug-1"
   command_topic: "cmnd/rfbridge/Backlog"
   availability_topic: "tele/rfbridge/LWT"
   payload_available: "Online"
   payload_not_available: "Offline"
   payload_on: "Rfraw AA B0 21 03 08 0186 03DE 299A 28190819090908181819090908190818190908190908181818 55; RfRaw 0 "
   payload_off: "Rfraw 0"
   optimistic: true
For the second category of remote controlled switches (Qiachip with EV1527 encoding), I ue the following configuration:
 - platform: mqtt
   name: "Light 1"
   state_topic: "cmnd/rfbridge/RESULT"
   command_topic: "cmnd/rfbridge/Backlog"
   payload_on: "RfSync 12020; RfLow 430; RfHigh 1270; RfCode #038104"
   payload_off: "RfSync 12020; RfLow 430; RfHigh 1270; RfCode #038108"
   optimistic: true
   icon: mdi:lightbulb
To find the codes, I bought some cheap Qiachip EV1527 modules, sniffed the code sent using the RF bridge console, and used them to "teach" the remote controlled switches. Then, I simply copied the code in the HomeAssistant configuration (see above).
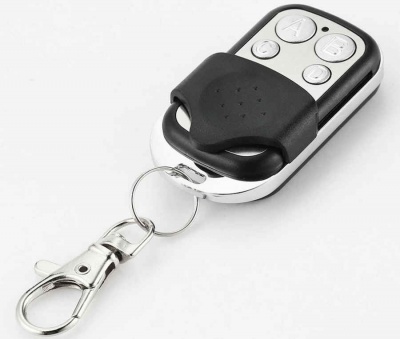
I have also tried to use the following remote controller (HFY408G).
I wasn't able to learn any code with the battery provided with the device. I managed to make them work by using an external 12v power supply. I have "teached" this controller using a Qiachip module.
Here is a trace of the codes:
 12:03:45.095 MQT: tele/rfbridge/RESULT = {"Time":"2021-09-26T12:03:45","RfReceived":{"Sync":12210,"Low":400,"High":1230,"Data":"509B01","RfKey":"None"}}
 12:03:49.938 MQT: tele/rfbridge/RESULT = {"Time":"2021-09-26T12:03:49","RfReceived":{"Sync":12210,"Low":390,"High":1230,"Data":"509B04","RfKey":"None"}}
 12:03:55.080 MQT: tele/rfbridge/RESULT = {"Time":"2021-09-26T12:03:55","RfReceived":{"Sync":12220,"Low":390,"High":1210,"Data":"509B08","RfKey":"None"}}
 12:03:57.358 MQT: tele/rfbridge/RESULT = {"Time":"2021-09-26T12:03:57","RfReceived":{"Sync":12190,"Low":400,"High":1230,"Data":"509B02","RfKey":"None"}}
Once the code are made available in MQTT they have to be processed in HomeAssistant.
Several solutions can be used, as shown here. On my side, I have used Node Red to demultiplex the MQTT frame.
Here is an example of a frame published for the "tele/rfbridge/RESULT" topic:
 {
   "Time": "2021-09-26T14:45:23",
   "RfReceived": {
       "Sync": 12240,
       "Low": 370,
       "High": 1180,
       "Data": "509B04",
       "RfKey": "None"
   }
 }
The code, which will change with each RF key and each button, is contained in the "data" field.
To make the usage of this information easier, we publish a specific topic when a button is pressed.
This is done by the following Node Red graph:
The main node is the function node. The code is the following:
 var d =
     {
         '509B04':['k1a','ON','false'],
         '509B08':['k1b','ON','false'],
         '509B01':['k1c','ON','false'],
         '509B02':['k1d','ON','false']
     };

 var p = msg.payload.RfReceived.Data;

 if (p in d) {
   msg.topic = "key/" + d[p][0];
   msg.payload = d[p][1];
   msg.retain = d[p][2];
   msg.qos = 0;
 }
 else {
   msg.topic = "key/unknown";
   msg.payload = p;
   msg.retain = "false";
   msg.qos = 0;
 }

 return msg;
Once the "key/k1<x>" topic have been created, they can be used in other automations, as shown below:


