ESP8266 page
From Eric
m |
m |
||
| Line 12: | Line 12: | ||
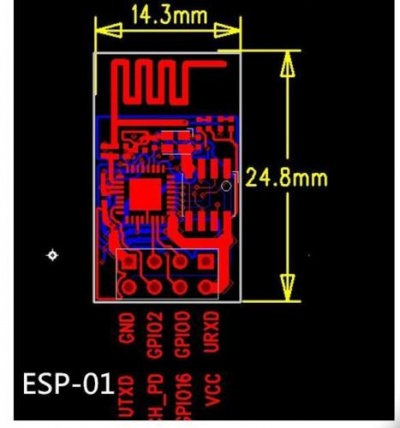
The pin-out is the following. | The pin-out is the following. | ||
| - | [[File: | + | [[File:esp8266_pinout.jpg|400px|thumb|none]] |
Revision as of 15:20, 17 April 2016
Contents |
The chip
The ESP8266 is a SoC designed by Espressif.
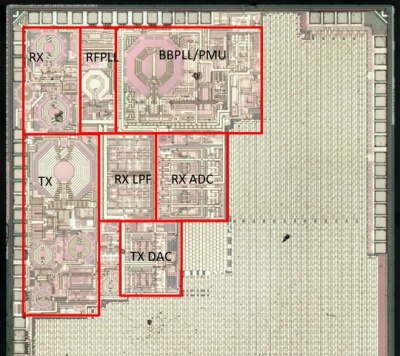
Someone managed to decap the chip (well, a similar one) and show its internal layout (source here):
The MCU is a lx106 processor IP.
The board
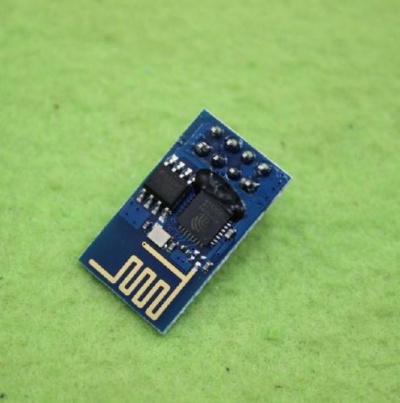
I use the following board.
The pin-out is the following.
Connecting the ESP8266 board to a PC
Using AT commands
Every command must end with a CR/LF sequence. On minicom, this can be obtained using CTRL-M followed by CTRL-J. The AT commands are fully described in Espressif manual "[|ESP8266 AT Instruction Set]".
Here is a trace of the commands I used to
Reprogramming the ESP8266
The ESP8266 can be reprogrammed. To do so, you can either go the easy way using Arduino or the hard way installing a cross-compiler, a download, etc.
Using the Arduino environment
(To be completed.)
Installing a cross-compilation environment
I have followed the indications given here. A lot of information is also provided by Espressif on their [1]). In particular, a lot of documents are available on page.
On a fresh MINT installation, here are the commands I had to type to get a complete development environment:
 git clone --recursive https://github.com/pfalcon/esp-open-sdk.git
 cd esp-open-sdk/
 sudo apt-get install autoconf
 sudo apt-get install gperf
 sudo apt-get install texinfo
 sudo apt-get install libtool
 sudo apt-get install automake
 sudo apt-get install ncurses-dev
 sudo apt-get install g++
 sudo apt-get install expat
 make STANDALONE=y
A lot of very interesting/important information about programming the ESP8266 are given here.
Building and installing the cross-compiler and sdk
Uploading the software to the chip
The chip can be placed in the flash programming mode by pulling up GPIO0 during power-on.
A flash download tool is provided by Espressif here. ANother tool (using Python) is available here.


