Quoi de neuf 2021
From Eric
(Difference between revisions)
m |
m |
||
| Line 3: | Line 3: | ||
== August 2021 == | == August 2021 == | ||
| - | * I have continued | + | * I have continued playing with Home Assistant et al. |
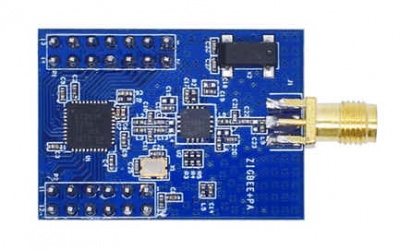
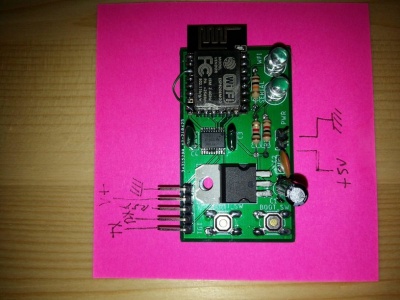
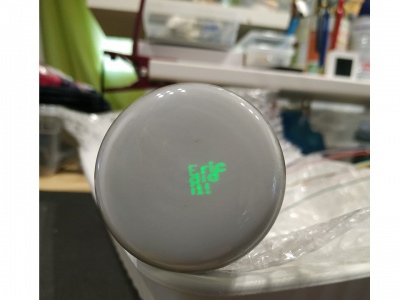
| - | ** I have built a Zigbee remotely controlable 2-relay device with a motion sensor. The device also plays the role of a Zigbee router. The heart of the device is a CC2530+CC2591 module | + | ** I have built a Zigbee remotely controlable 2-relay device with a motion sensor. The device also plays the role of a Zigbee router. The heart of the device is a CC2530+CC2591 module programmed with the [[https://ptvo.info | PTVO firmware]]. [[File:cc2530_2591.jpg|400px|thumb|none]] The motion sensor is a very cheap RCWL-0516. [[File:rcwl-0516.jpg|400px|thumb|none]]. The CC2530 is powered by a Hi-link 220V to 3.3 module. In order to have a better detection distance, the motion sensor is powered by a 5V source generated from the 3.3V source using an up converter. |
| - | ** I have also implemented a display device using an ILI9341 display, a DFPlayer and a PAM8403 amplifier (to play | + | ** I have also implemented a display device using an ILI9341 display, a DFPlayer and a PAM8403 amplifier (to play pre-recorded messages). For the moment, the display shows the time of day, the temperature and the humidity level. The device is controlled by an ESP32 with the ESPHome firmware. |
** More details are available on the Zigbee [[Zigbee | dedicated page]]. | ** More details are available on the Zigbee [[Zigbee | dedicated page]]. | ||
Revision as of 15:54, 16 August 2021
Experiments carried out in the past (from 2011) are described hereafter: 2020, 2019, 2018, 2017, 2016, 2015, 2014, 2013, 2012, 2011
Contents |
August 2021
- I have continued playing with Home Assistant et al.
- I have built a Zigbee remotely controlable 2-relay device with a motion sensor. The device also plays the role of a Zigbee router. The heart of the device is a CC2530+CC2591 module programmed with the [| PTVO firmware]. The motion sensor is a very cheap RCWL-0516.
 . The CC2530 is powered by a Hi-link 220V to 3.3 module. In order to have a better detection distance, the motion sensor is powered by a 5V source generated from the 3.3V source using an up converter.
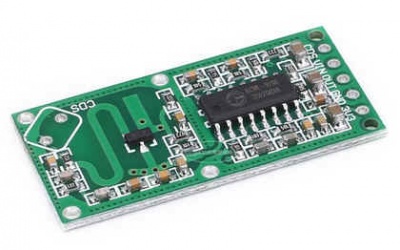
- I have also implemented a display device using an ILI9341 display, a DFPlayer and a PAM8403 amplifier (to play pre-recorded messages). For the moment, the display shows the time of day, the temperature and the humidity level. The device is controlled by an ESP32 with the ESPHome firmware.
- More details are available on the Zigbee dedicated page.
- I have built a Zigbee remotely controlable 2-relay device with a motion sensor. The device also plays the role of a Zigbee router. The heart of the device is a CC2530+CC2591 module programmed with the [| PTVO firmware].


July 2021
- Continuing playing with Zigbee.
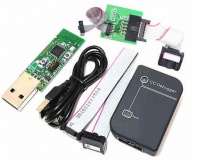
- I have created a Zigbee device using a simple CC2530 board and a firmware generator for this device (if you want to develop your own firmware for the CC, you'll need to buy the compiler...).
- I have installed "Home Assistant" and "zigbee2mqtt". Now, I would be able to control / automate a few things in my house, but I am not convinced that this is actually very useful...
- See the dedicated page.
- I have come back to my back scanner (first iteration in 2014 or so) in order to finish it. See the dedicated page.
June 2021
- I am now playing with Zigbee devices.
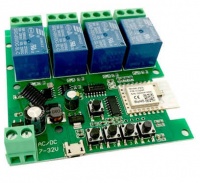
- I have bought a CC2531 Zigbee sniffer, a small Sonoff bridge and a 4-relay zigbee board (all from AliExpress). Now,n I can control four relays using Amazon Alexa... As usual, interesting but completely useless... The next step is to setuop my own home zigbee server using Zigbee2MQTT.

- To contol the temperature of a Pi:
- I have bought a CC2531 Zigbee sniffer, a small Sonoff bridge and a 4-relay zigbee board (all from AliExpress). Now,n I can control four relays using Amazon Alexa... As usual, interesting but completely useless... The next step is to setuop my own home zigbee server using Zigbee2MQTT.


/opt/vc/bin/vcgencmd measure_temp
- I have built two small keyboards using at Atmega32U: File:Keyboards.jpg400px
May 2021
- Building a small custom keyboard using cheap Gateron switches and keycaps, and either an arduino or a bare Atmega (using the VUsb library). See also the LUFA library.
- I have soldered 2 ESP-Link boards:

April 2021
- I have setup a esp-link serial<=>wifi converter. This very handy device, based on a ESP8266, allows an Arduino to be programmed remotely (without USB cable).
- After frying 3 ESP8266 due to bad breadboards (and my own stupidity), I have built a small board using my usual combination of solder bridges and wrapping.
 I have added a level converter (a YF08E), connected an 5V Arduino pro mini on one side, my board on the other side and, voila!, I can now upload software to the Arduino wirelessly... I have put information and links on a dedicated page. Now, I will build a small PCB to make it more handy.
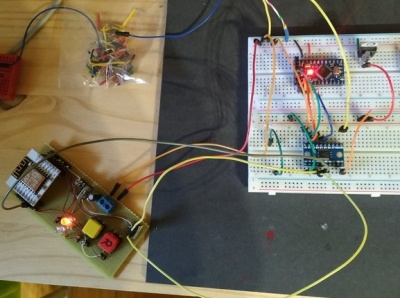
- After frying 3 ESP8266 due to bad breadboards (and my own stupidity), I have built a small board using my usual combination of solder bridges and wrapping.
- I have put my CubeCell meteo sensor in a box, added battery control. For the moment the power consumption is much too high. With a supposedly 550mAh battery, the device works for around 24h.
- I guess that this is due to the sensor being powered on permanently. One solution would consist in powerin the sensor via a GPIO, but as my board is fitted with multiple sensors, I am dreading the current being drawn being too high. I'll check and, if it is too high, I'll simply add a FET transistor to control the sensor's power.


- I have implemented a minimalistic game using my galvo. See my video (in french).
File:Galvogame.jpg
400px
March 2021
- 2021/03/07
- I have resurrected my galvo project. This is a long story. More information can be found on the dedicated page.
February 2021
- 2021/02/21
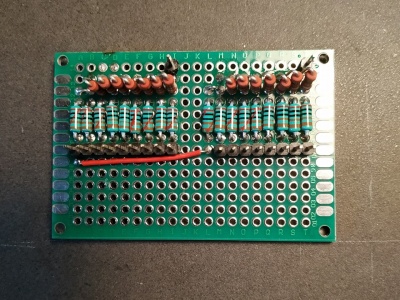
- The refresh rate of my CRT was much too slow and one could see the display refresh even with 5 characters displayed. So I built a 8-bit DAC using a R2R resistor ladder in order to avoid the I2C latency of the MCP:
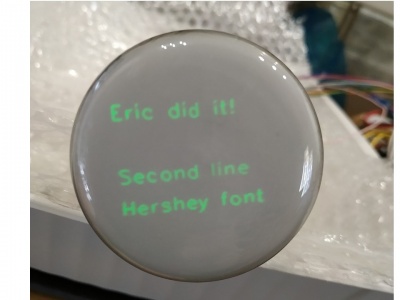
- But the Arduino was in any case a bit too slow and has too few output pins. So I switched to an ESP32 (with two cores: one to refresh the display and the other to run some game...). And I discovered that the ESP32 has two DACs (connected to pin 25 and 26)! So I used the two internal DACs. ANd the result is much better. Now, I can display several lines of text without any flickering:
- Now, I'll try to use it to implement some stupid game.
- There is a video here (in french, sorry...).
- The refresh rate of my CRT was much too slow and one could see the display refresh even with 5 characters displayed. So I built a 8-bit DAC using a R2R resistor ladder in order to avoid the I2C latency of the MCP:


- 2021/02/20
- I have managed to drive my CRT! To display text, I combined the Hershey's font definition provided at http://paulbourke.net/dataformats/hershey/ (slightly adapted), and the line plotting code from Alan Wolke (weaew). First, I used an Arduino fitted with two MCP4725 DACs:
- I have managed to drive my CRT! To display text, I combined the Hershey's font definition provided at http://paulbourke.net/dataformats/hershey/ (slightly adapted), and the line plotting code from Alan Wolke (weaew). First, I used an Arduino fitted with two MCP4725 DACs:


- 2021/02/14
- I have received my russian CRT and have built the power supplies and the plate drivers. See article oscilloscope. Here are a few pictures of the current setup:


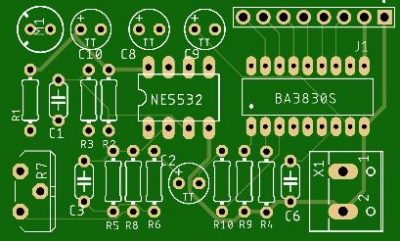
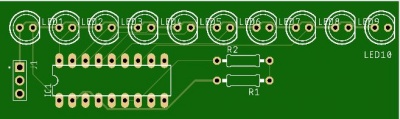
- I have completed my "sound spectrum analyser" using a BA3830 and a bunch of LM3914N. A video is available here (definitively non interesting). The PCBs have been built by JLPCB (nice and fast. A few pictures are at Sound spectrum analyzer.

- I have added a Python MQTT client to log the temp, humidity, pressure, etc. data to a mysql database. I use "sqlbrowser" to display the content of the data base. If I find some time, I'll write a Python HMI. Another solution would be to use an InfluxDb database (optimized for time series) and a Grafana dashboard. See tutorial here. I should also probably move to a more robust RPi distribution (e.g., dietpi) in order to prevent the nasty effect of power-cuts on the file system (dietpi allows to set parts of the file system read-only).
January 2021
- I have moved my lab to a new, much larger, room:


- Waiting for the transformer to drive a CRT (see Quoi de neuf 2020, december).


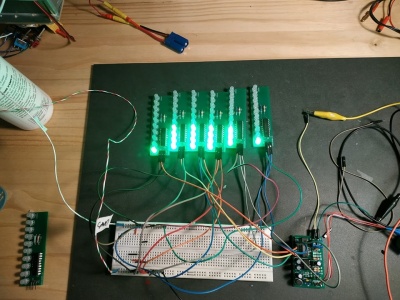
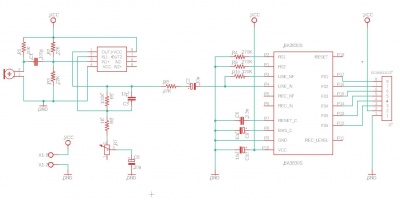
- I have created a LED "spectrum analyzer" using an electret microphone, a 5532 op amp (see here), a BA3830S spec. anal., and a LM3914 LED display driver. Nothing very complicated, but just a way to occupy time. Here is the schematics and the PCBs
 .
.
- I am also playng with my cubecell. I have attached a solar panel, a battery, and a CJMCU-8128 set of sensors. The guy transmits it data via LORA to a ESP32 which relays them to a MQTT Mosquitto server running on an RPi...


